
Rustic Leather & Bead Necklace (Tutorial)
by Rena Klingenberg. © 2003-Present Rena Klingenberg. All Rights Reserved

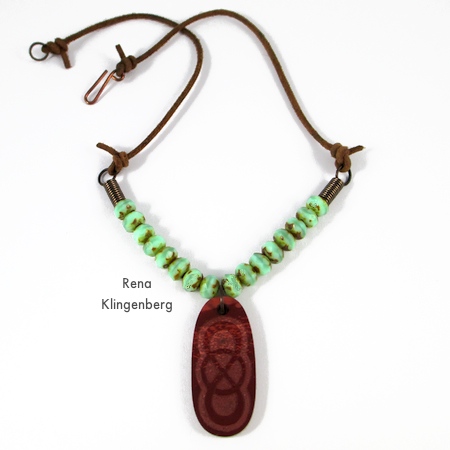
In this leather necklace tutorial, we’ll combine a pendant and beads with medium-width cord for a rustic look.

I’m using Czech glass beads here, but you could also make this necklace with pearls or any other beads – no matter how small the bead holes – because the beads won’t be strung on the leather cord.

Depending on the pendant and beads you use, this finished piece could be worn by both men and women.
Supplies:
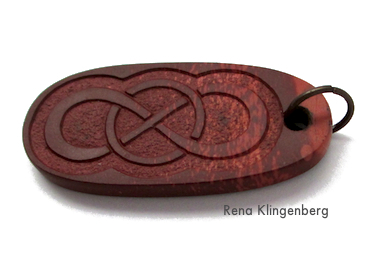
- A rustic, rugged, or natural pendant – either drilled front-to-back and a jump ring attached through the drill hole, or drilled sideways through the top.I’m using this wonderful hand-carved stone pendant by Stephen Lee.
- Beads that nicely accent your pendant.My finished beaded centerpiece in this necklace – from one jump ring end to the other – measures 5.25″ (13.33cm).
I’m using 16 picasso Czech glass beads, about 6×9 mm size:

- Leather cord, 2mm wide – 2 pieces.
Each piece of cord should be about 12.5″ (32cm) long for a 16″ (41cm) finished necklace.
This cord length allows for trimming 1″ (2.5cm) from each end after you tie your knots.
(Use more cord if you want a longer finished necklace than 16″ [41cm].)I’m using natural-color leather cord that’s salvaged from an old project, so it’s a bit weathered (just right for this rustic necklace!):

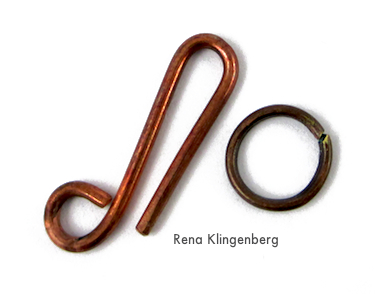
- Clasp – I’m using a handmade hook clasp, along with a jump ring for the eye end of the clasp.
You can make my Easy Hook Clasp Tutorial, or if you want to make the exact clasp I’m using here, you’ll find it in my Leather Cord Choker Tutorial.Here are the hook and jump ring I’m using for my clasp:
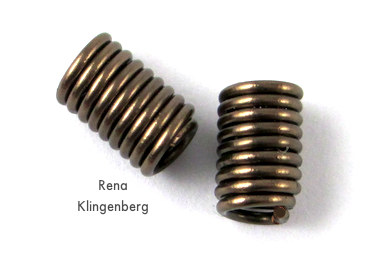
- 2 Handmade coiled crimp bead covers – make them from my How to Make Crimp Bead Covers Tutorial:
- Crimp beads.
- Beading wire.
- 2 jump rings – one for each end of your beading wire.
- Cutter for beading wire.
- Crimping pliers.
How to Make a Rustic
Leather & Bead Necklace
We’ll start by making the beaded centerpiece of the necklace first.
String half of your beads onto your beading wire.
(I put a small clamp on one end of my beading wire, so the beads can’t sneak away):

Next, string your pendant onto your beading wire:

Now string the second half of your beads onto the beading wire:

Finish off one end of your beading wire by making an empty loop in the wire, with 2 crimp beads to hold the loop in place.
(I nearly always use 2 crimp beads instead of 1, for greater security.)
Then finish off the second end of your beading wire the same way, with a loop and 2 crimp beads:

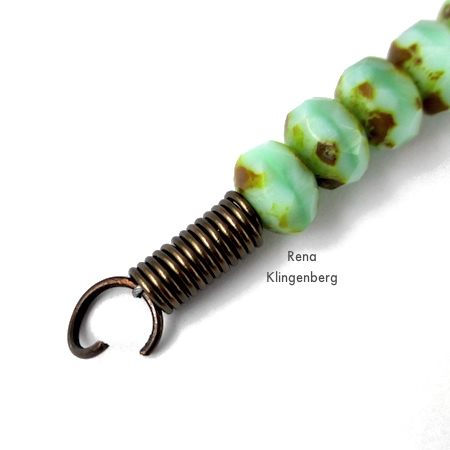
Now slide one of your coiled wire crimp bead covers onto one end of your finished beading wire:

Twist open one of your jump rings and string the jump ring through the small exposed tip of your beading wire loop:
Twist the jump ring shut:

Now add a coiled crimp bead cover and jump ring to the other end of your beading wire.
Your finished beaded centerpiece for your necklace should now look like this:

It’s time to tie the leather cords to the jump ring ends of your beaded centerpiece.
For each knot, we’re going to make 2 half-hitches (don’t worry – it’s easy).
We’ll start by making the first half-hitch to tie one cord to one of your beading wire jump rings.
The instructions for each step are below this photo:

- Photo 1:
String one end of your leather cord through the jump ring at the end of your beading wire. - Photo 2:
Bring the tail of your cord around and lay it across the main part of the cord. - Photo 3:
Thread the tail of your cord UNDER the main part of the cord, and OVER the bottom cord. - Photo 4:
Pull the tail of your cord to tighten up your first half hitch.
Now we’ll make the second half-hitch knot, right beside the first one.
The instructions for each step are below this photo:

- Photo 1:
Here’s where we left off, after making our first half-hitch. - Photo 2:
Bring the tail of your cord around and lay it across the main part of the cord. - Photo 3:
Thread the tail of your cord UNDER the main part of the cord, and OVER the bottom cord. - Photo 4:
Pull the tail of your cord to straighten and tighten up your second half hitch.
Now we’ll pull the tail of the cord really tight, to make both of our half hitches nice and strong.
TIP: Grab the tail of your cord with flat nose pliers so you can pull it hard and make your knot very tight.
Then trim off most of the excess cord tail (leaving a very small tail):

Now pick up your second piece of leather cord and move to the other end of your beading wire.
Attach one end of this cord to the jump ring on the end of your beading wire, using the same knot as before (2 half-hitches):

Now each jump ring at the ends of your beaded centerpiece should have a leather cord end knotted to it, like this:

It’s time to add the clasp to your necklace.
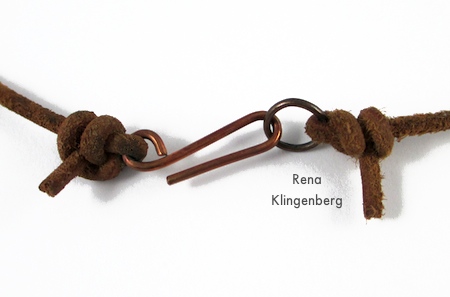
Use the 2 half-hitches knot to attach the hook clasp to one of your unfinished cord ends:

Now move to the other unfinished cord end, and attach it to the jump ring that serves as the other end of your clasp.
Again, use the 2 half-hitches knot:

When finished, your fastened clasp should look something like this:
And your finished necklace should look like this:


