
Build a Tabletop Photography Studio for Your Jewelry
by Andrea Tanner.
Starting a jewelry business on a student budget is not ideal, but that’s all I had to work with when starting my dream. I became very creative with my resources.
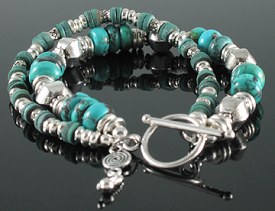
South by Southwest Bracelet
by Andrea Tanner, Peluche Designs
I knew that in a retail business, especially with accessories, appearance is everything.
So to make my website look like a serious business, I needed to make the images of my jewelry look professionally done.
I admit I have never taken a photography class in my life, but I knew that it could be learned, so I started doing a lot of research.
I found some wonderful and resourceful websites that gave the outline of what I needed to do and what supplies to get so I could build a tabletop photography studio for my jewelry.
Thankfully, I already owned my own digital camera (Canon Powershot A95), which has made all the difference.
It may take some time, but if you are not familiar with your camera, read the handbook and spend some time learning the correct shutter speeds and settings. Also, be sure to get a tripod. The tripod is an absolute must when dealing with tabletop photography. I bought one off the Internet for under $20.
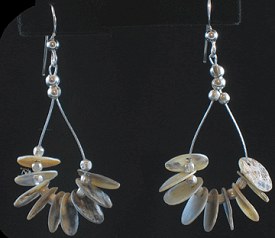
Mother of Pearl Earrings
by Andrea Tanner, Peluche Designs
Since I already had the camera, the rest of my jewelry photography supplies were fairly cheap. I realized the most important thing was to create an atmosphere.
I bought a light tent that was 40″ x 40″ x 40″, and although I could have gone with a smaller size I like having room to work with.
The next most important thing was the appropriate lighting for photographing jewelry.
I didn’t want to spend a lot of money, so I found some cheap table lamps from Wal-Mart and spent money on the more expensive light bulbs. I found some LED light bulbs that were as close to 3000k as possible.
This created the perfect, soft lighting effect in the tent that reflected off the smooth surfaces of my jewelry and illuminated the colors and shine of the beads.
The next thing I bought was perhaps the key ingredient of the whole project. I found a small, black, acrylic stand to display the jewelry on. I honestly believe that everything looks better against a black background to make it stand out more, as well as to give it a “classy” feel.
The acrylic stand also allowed for a beautiful reflection to be created so the resulting picture looked as though it had been done in a professional studio.
(Just make sure to dust it off with a soft, clean fan brush before taking every photo. Any speck of dust that’s left on the stand will show up in the picture and distract from the jewelry.)
The final touch is a backing material to create a backdrop for the photo.
I went to a fabric store and found two yards of velvet fabric on sale for $0.85 a yard. That made sure there was no white from the lighting tent peeking through behind the display.
Learning tabletop photography has really made a difference in the appearance of my website. I am asked often who I hired to take my pictures because they look professional.
I know that if I can learn to take pictures of jewelry without any real training, anyone can!
Author Andrea Tanner’s Peluche Designs is composed of handcrafted jewelry with an assortment of beautiful beads collected from across the country. She specializes in accessory charms that make for perfect, inexpensive gifts. These charms can personalize your cell phone, Blackberry, purse, backpack, or anything with a zipper.
