
Rugged Hardware Necklace (Tutorial)
by Rena Klingenberg.
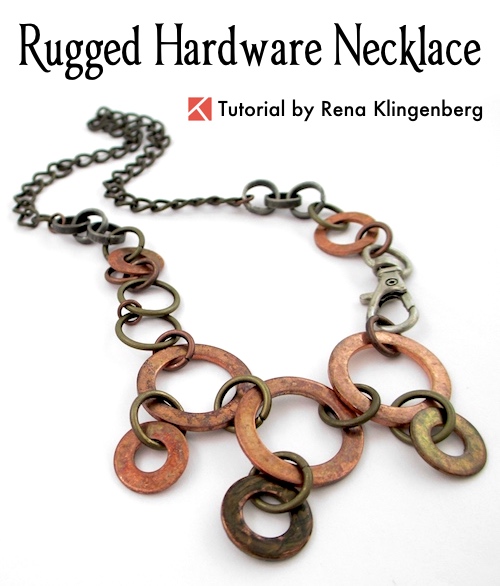
This rugged necklace is made with a combination of hardware-store components and jewelry components.

It has a grungy, industrial feel – and thanks to the hardware components, it’s a bit heavier than most necklaces.
This necklace is just a basic idea.
It can be worn by guys and gals.
You can take it in all sorts of interesting directions – steampunk, edgy, futuristic, repurposing, etc.
This is a fun opportunity to find unusual or leftover items in your stash (and garage) – and design with them!
Supplies:
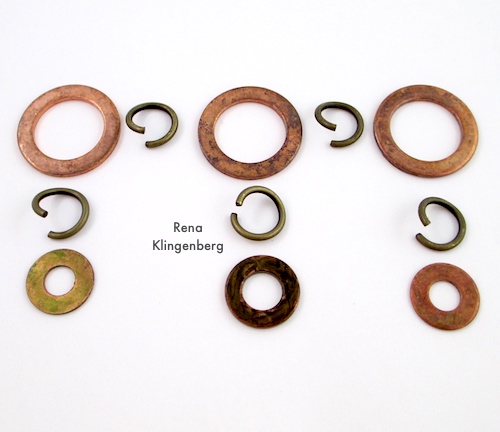
Here are the components that went into this necklace:

- 3 large copper washers – 23.81mm (15/16″) in diameter; with a center hole 15.88mm (5/8″) in diameter.
In the U.S. you can find copper washers at Harbor Freight. - 2 medium copper washers – 15.88mm (5/8″) in diameter; with a center hole 9.52mm (3/8″) in diameter.
- 3 small copper washers – 14.29mm (9/16″) in diameter; with a center hole 6.35mm (1/4″) in diameter.
- Pewter swivel clasp, 31.75mm (1.25″) size.
- 2 antiqued brass jump rings, 15mm size, heavy gauge.
- 7 antiqued brass jump rings, 12mm size, heavy gauge.
- 5 antique copper jump rings, 10mm size, heavy gauge.
- 3 antiqued copper jump rings, 6mm size.
- 6 links of heavy gauge chain, link diameter 10mm, link width 1.5mm.
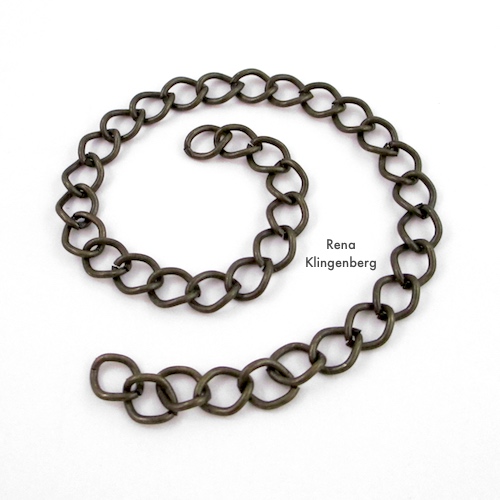
- Antiqued brass curb chain, 228.6mm (9″) long, link size 6mm x 9mm.
- You’ll also need flat nose pliers and chain nose pliers for opening and closing your jump rings.
A Few Ways to Darken or Antique
Your Copper Washers:
If you want to make your copper washers more of an antiqued color instead of bright and shiny, here are three easy ways to achieve that.
- You can leave copper washers out in the open air for a period of time. In most locales, the washers will darken to an antiqued color on their own that way.
- Or you can use my tutorial for creating these jewelry patina techniques.
- Or you can use my tutorial for giving metal an oxidized look.
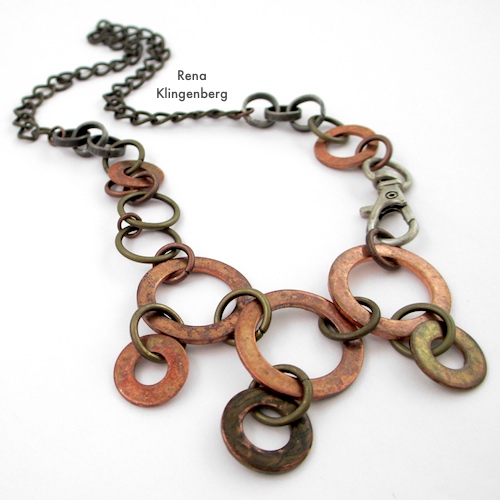
How I Made This
Rugged Hardware Necklace
If you’re new to using jump rings, see my quick tip, How to Open and Close a Jump Ring.
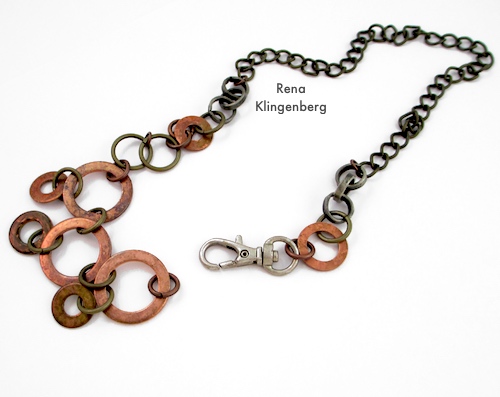
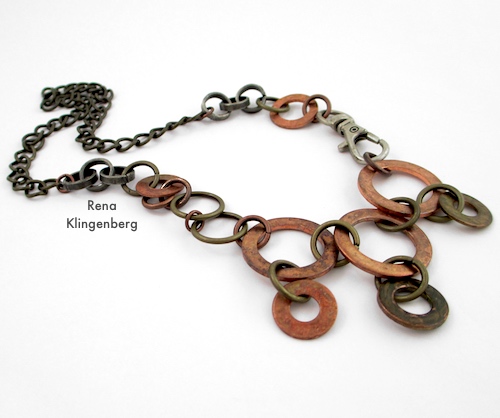
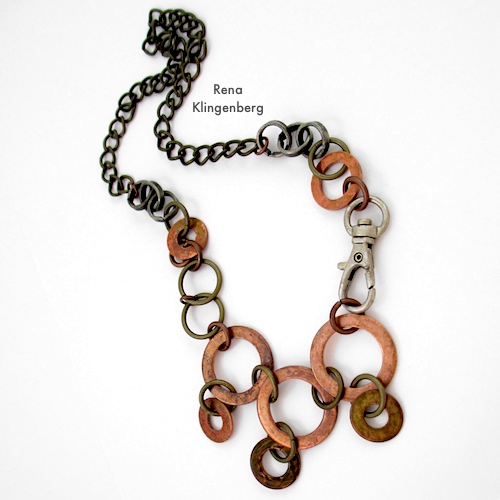
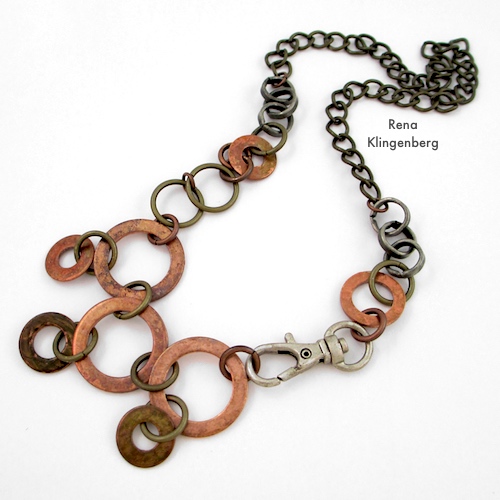
This necklace is 457.2mm (18″) long, with a 228.6mm (9″) bib section and a 228.6mm (9″) chain section:
I decided to start by creating the bib section of the necklace.
And I knew I wanted the swivel clasp closure to be in the front of the necklace, not the back.
So I laid out a pattern of my 3 large copper washers, and my 3 small copper washers.
I used my flat nose and chain nose pliers to open the five 12mm antiqued brass jump rings that would connect all these washers:
Then I connected the washers with the jump rings I had laid out, and used my pliers to twist the jump rings shut again:
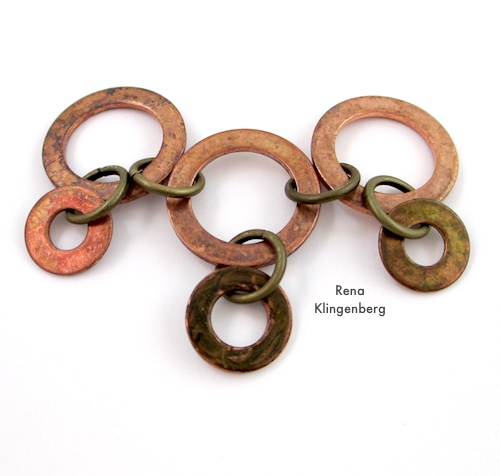
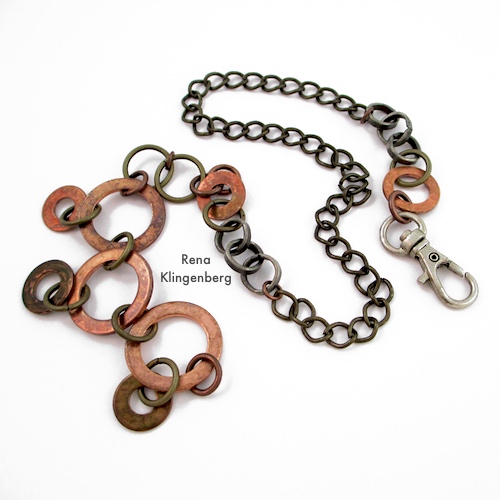
Then I built the sides of the bib up from there, using the swivel clasp, jump rings of different sizes, small copper washers, plus links of the heavy gauge chain.
I made this bib section 228.6mm (9″) long:
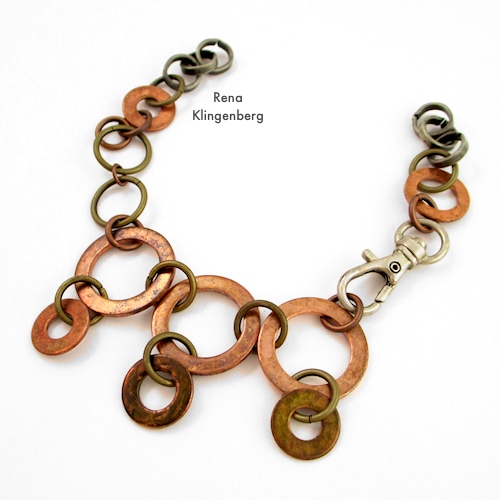
Next came the chain – antiqued brass curb chain, 228.6mm (9″) long, to finish the necklace:
I used small antiqued copper jump rings to attach the chain ends to the bib ends:

And my finished rugged hardware necklace looks like this:

A Few More Ideas for this Necklace:
- Do some letter stamping on your copper washers.
- On the three large copper focal washers in the bib section of the necklace, hang pendants, a special memento, arrowheads, shark teeth, etc. – instead of the small copper washers.
- Make the necklace long enough to wear it as a wrap bracelet sometimes:

