
Stacked Rings Necklace (Tutorial)
by Rena Klingenberg. © 2003-Present Rena Klingenberg. All Rights Reserved

You know how sometimes you put a pendant on a chain or cord … but it looks like it needs a little something more?
Sometimes I like to stack a few beads, metal links, or washers above the pendant to give it that extra touch that’s missing:
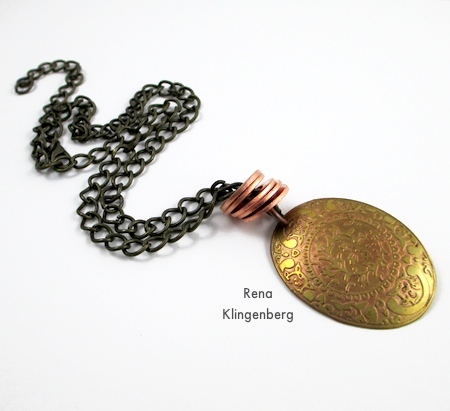
On the left side of the photo below, you can see just a metal pendant on a chain.
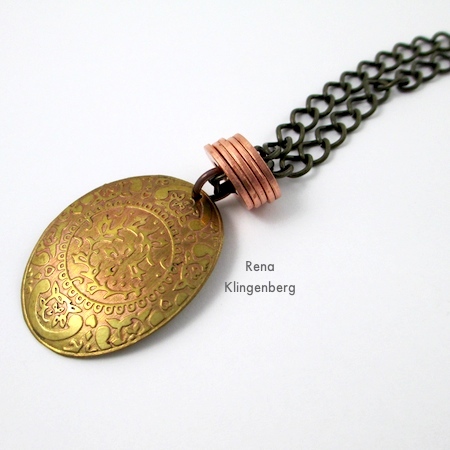
On the right side of the photo, you can see it with a stack of copper washers above the pendant – adding color and interest:

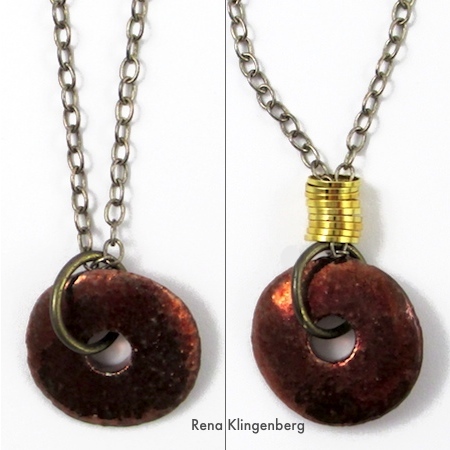
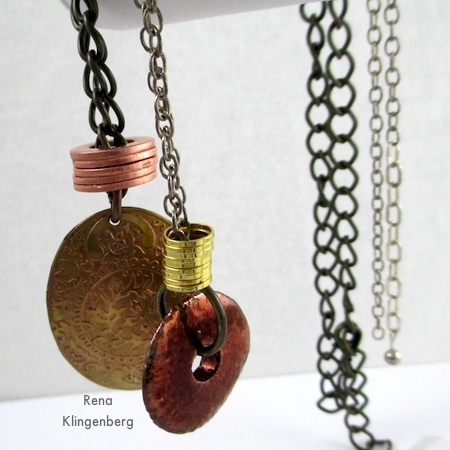
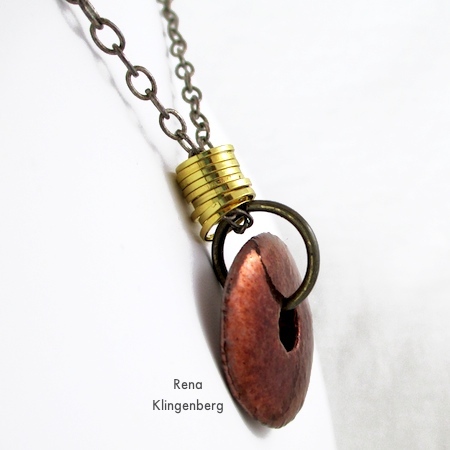
Similarly, on the left side of the photo below, you’ll see a coppery ceramic donut pendant with a chunky jump ring on a chain.
On the right side of the photo, you’ll see it jazzed up with a stack of shiny brass jewelry links above the pendant:
A stack of “rings” is a simple element to add to the piece – but it elevates an ordinary necklace to a much more interesting accessory.

Supplies:
- A pendant.
- A jump ring to attach the pendant to your chain or cord.
- A chain or cord to hang the pendant on.
- A small stack of ring-shaped items to string above your pendant.
Make sure the hole in the center of these items will accommodate two strands of your chain or cord.
(I used a stack of copper washers for one of my necklaces here, and a stack of round brass jewelry links for the other necklace.) - Clasp for your necklace.
- Flat nose / chain nose pliers to open and close jump rings.
How to Make a
Stacked Rings Necklace:
These are the ingredients I used for my smaller necklace – a coppery ceramic donut bead, plus nine round brass jewelry links for the stacked rings effect:

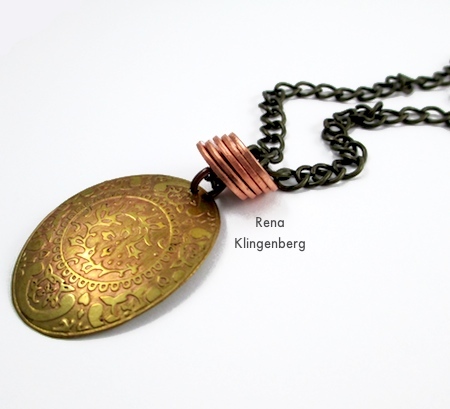
And here’s what I used for my larger necklace – an oval metal pendant, plus five small copper washers:

Are you new to using jump rings?
See my quick tip on how to open and close jump rings.
Now let’s get started.
Use your flat nose and chain nose pliers to twist open your jump ring.
Then thread it through the hole in your pendant:
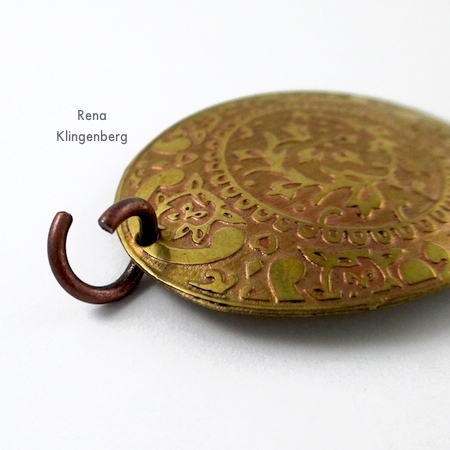
Use your flat nose and chain nose pliers to twist the jump ring shut again:

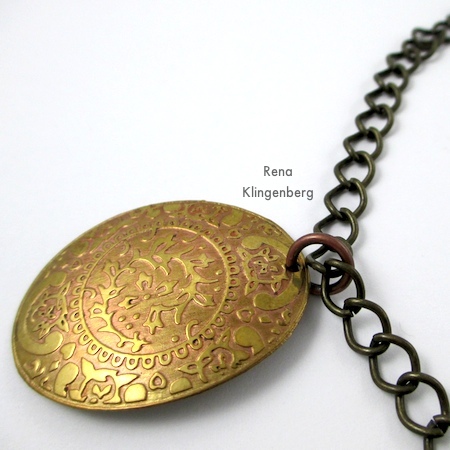
Now bring your chain over to the pendant:

. . . and thread the chain through the jump ring, until the centerpoint of the chain is inside the jump ring:
Next we’ll add the “rings” (washers, jewelry links, beads, or whatever you’re using):

Keeping both chain ends side by side, start stringing the rings onto the chain:

. . . and keep stringing till all of your rings are on the chain:

Push the rings all the way down against the top of the pendant’s jump ring:
Now for the finishing touch – attaching the clasp.
Use your flat nose and chain nose pliers to twist open the clasp’s jump ring:

String the jump ring through the last link on one end of your chain.
Use your pliers to twist the jump ring shut again:

Your finished necklace may look something like these:
And Here Are
Some Variations of this Idea:
Here I’m using various types of beads above pendants on cords.
Turquoise donut on leather cord – by itself, and with two ceramic beads:

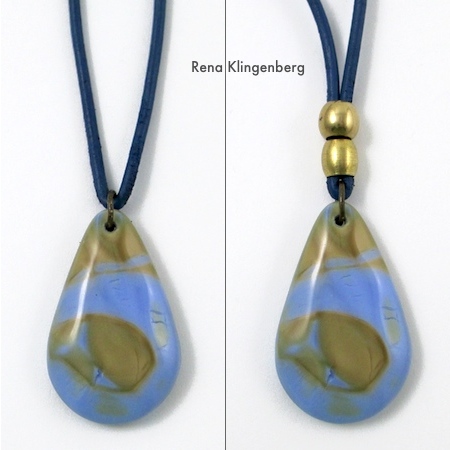
Glass pendant on leather cord – by itself, and with two brass beads:
Polymer clay pendant on hemp cord – by itself, and with a clay bead:

Of course, you don’t always have to use this technique when you put a pendant on a cord or chain.
But sometimes it’s just the little extra touch that really makes the finished piece sing! 🙂
