
Wire Line Art Pendant (Tutorial)
by Rena Klingenberg. © 2003-Present Rena Klingenberg. All Rights Reserved

Here’s a different kind of wire pendant that’s fun to create.

It involves making wire shapes and arranging them into a pleasing design or picture in a jewelry photo frame.

Most wire pendants use the wire as a three-dimensional structure or sculpture.
But in this project we’ll use the wire as lines to create flat art inside a frame.
Supplies:
- Photo jewelry pendant frame.
Mine is from Ranger Inkssentials Memory Frames, 1″x3″ (25.4mm x 76.2mm) rectangular photo frame.
The frame opens at one top corner with a small metal latch: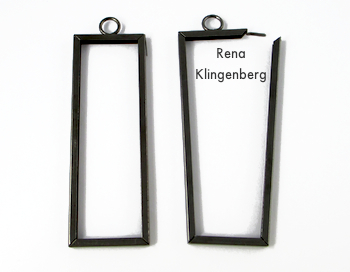
- 2 pieces of glass that are made to fit in your photo jewelry pendant frame.
Mine are Ranger Inkssentials Memory Glass, 1″x3″ (25.4mm x 76.2mm) size.
Often the glass comes with the frame – but if not, then you’ll need to buy the glass separately: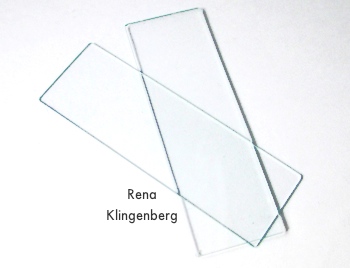
If you can’t find the frames I used, you can do an online search for “jewelry pendant frames” or “jewelry frame pendant” to find other frames suitable for this project.
- 24 gauge round black craft wire / Artistic Wire.
I found that any wire thicker than 24 gauge was too thick to work in my pendant frame.
However, your frame may be different from mine, and you may be need to use a thicker or thinner wire than 24 gauge. - Wire cutter.
- Pliers and / or other tools for shaping your wire.
- Jeweler’s steel block and plastic, rubber or rawhide hammer.
- Flat nose / chain nose pliers for opening and closing a jump ring.
- Piece of paper the same size as your glass pieces.
This will be the background for your wire art.
I cut a 1″x3″ (25.4mm x 76.2mm) piece from a scrap of ordinary white computer / typing paper. - Regular white “school” glue – such as Elmer’s, etc.
- Toothpicks.
- Jump ring – I used a fairly large one, so I’d have the option to wear the pendant on different sizes of cords / chains / ribbons.
- Cord, chain, etc. for wearing your pendant.
How to Make a
Wire Line Art Pendant:
IMPORTANT:
Because these jewelry frames were designed to hold flat objects like photos, I discovered that all wire in the design must lie flat in a single layer so it can fit into the frame.
I found that if any wires in the design crossed, wrapped, or layered over each other, it made the wire design too thick to fit in the frame.
However, you may want to experiment with that.
Your frame may be different from mine, and you may be able to layer wire pieces or use a thicker wire than 24 gauge.
Start out by deciding what kind of line art design you want for your pendant.
Abstract? A flower with a long stem?
Here are some shape ideas to get you started:
- spirals
- squiggles
- zig-zags
- curves
- angles
- geometric shapes
- straight lines
- symbols
- letters
- numbers.
Use your pliers or other tools to shape your wire:

I started with no design plan in mind.
I simply made a few curved wire shapes, and decided I’d make a design from them.
Below are the four simple wire shapes I made – one long, one medium length, and two small shapes.
I made sure each would fit within my 1″x3″ (25.4mm x 76.2mm) frame area:

After making your wire shapes, it’s important to flatten each shape, so that when you lay them on your paper background, nothing will be sticking up.
So place one wire shape at a time on your steel block and use your plastic, rubber or rawhide hammer to make each shape lie flat:

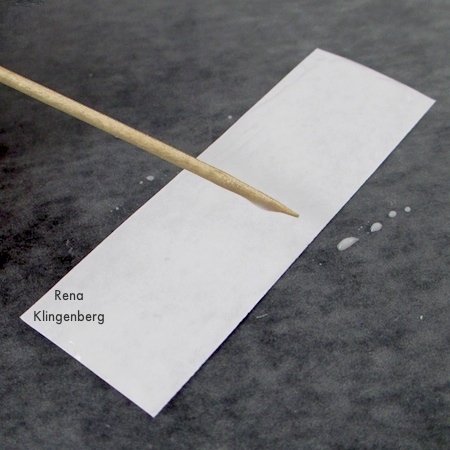
Now play around with your wires on your piece of background paper, until you get your design the way you want it.
Hot Tip: It’s easier to nudge the wire pieces into place with the tip of a toothpick than with fingers:

Once you’ve arranged your wires into a design you like, take a photo of it so you can refer back to exactly how it looks while you’re glueing the wires to the background paper.
Then remove the wire pieces from the background paper.
Now it’s time to glue your wire design onto the background paper.
Below, I’ve got my usual mess-confinement system (a plastic jewelry tray with all necessary supplies for the glueing procedure).
Inside the tray, I’ve got:
- a piece of waxed paper
- my small piece of background paper (on the waxed paper)
- a bottle of white glue
- toothpicks for arranging and pressing down the wire pieces
- a paper towel for wiping glue off my fingers
- my four wire shapes.

(Outside the tray, have your phone or camera showing the photo you just took of your wire design; you’ll be glad to refer to it while you’re positioning your wire pieces on the glue.)
Start by squeezing a thin layer of white glue onto your background paper:

Use the side of a toothpick to spread the glue evenly over the entire top surface of the background paper; the glue should be a thin layer:
Referring to your photo of the design, place your largest wire shape on the gluey background paper.
Use the tip of a toothpick to nudge the wire into place.
When you’re happy with its placement, use the side of the toothpick to press every part of the wire against the paper, so that all parts of the wire are stuck into the glue:

Add the next largest wire shape to your paper, positioning it with a toothpick tip and pressing every part of it down into the glue with the toothpick’s side:

Continue adding your wire pieces to the design, positioning them where you want them, and then pressing them down into the glue.
When you’re finished, your workspace may look something like this:

Now let your glued project dry for at least one hour.
When it’s dry, pick up your background paper that has the wire pieces glued to it.
Lay it on the bottom piece of glass from your pendant frame:

Then lay the top piece of glass over the surface of your paper and wires, making a “sandwich”:

Open the latch at the corner of your photo frame, and open up the frame.
Keeping the sandwich together, slide it into the opened photo frame:

Press the metal frame edges into place around the glass sandwich, and thread the frame’s latch through the hole on the side of the frame:

Gently bend the latch downward to lock the frame shut:

Now use your flat nose / chain nose pliers to twist open your jump ring, and thread it through the loop at the top of your pendant frame:

Then twist the jump ring shut, and thread your choice of chain, cord, etc. through the jump ring.

Your finished Wire Line Art Pendant may look something like this:


