
Zen Spiral Bracelet Tutorial
by Rena Klingenberg. © 2003-Present Rena Klingenberg. All Rights Reserved

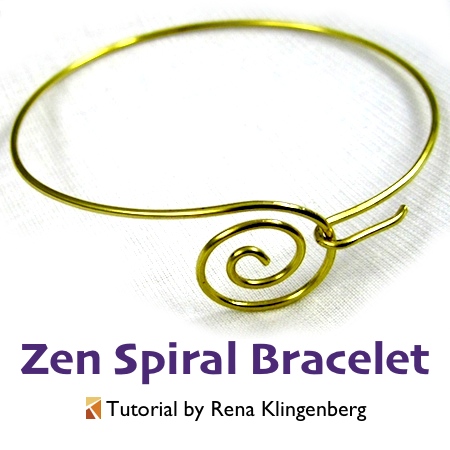
Zen Spiral Bracelet Tutorial by Rena Klingenberg
This graceful Zen Spiral Bracelet is a wire bangle that’s fast and easy to make.


Supplies:
- 16-gauge round wire. Measure your wrist and add 4.5″ (11.43 cm) to find how much wire you’ll need.
For example: a 7.5″ wrist + 4.5″ = a 12″ piece of wire.
- Wire cutter (be sure to use a cutter that’s made for heavier gauges of wire, so you don’t ruin your best cutters).
- Round nose pliers (again, be sure to use pliers that are made for heavier gauges of wire).
- A file, cup burr, or knife sharpening stone for smoothing off the wire ends.
- A round bracelet mandrel – or PVC pipe, soup can, or other hard, cylindrical object (I used an 8-ounce tomato sauce can).
- Nylon or rawhide jewelry hammer.
- Fine-tip Sharpie marker.
How to Make the
Zen Spiral Bracelet:
Cut your wire to the desired length:

Use your cup bur, file, or knife-sharpening stone to smooth and round both ends of your wire:

Use your fine-tip marker to draw a mark 3″ (7.62 cm) from one end of your wire (later you’ll make the spiral on this end of the wire):

Now use your marker to draw a mark 0.5″ (1.27 cm) from the other end of your wire (later you’ll make the hook clasp on this end of the wire):

Wrap your wire around your bracelet mandrel (or tomato sauce can, in my case!).
You can also do a bit of hammering on the wire here, to work-harden it.
We want to get our wire to stay in the shape of a round bangle bracelet:

Remove your wire from the mandrel.
Pull gently on the two wire ends to make the circle small enough that your two Sharpie marks line up – and they stay lined up when you let go of the wire:

Now we’re going to make the hook clasp.
On the wire end where you drew a mark 0.5″ (1.27 cm) from the end, grasp the very tip of the wire in your round nose pliers.
Make a slight curve, curving away from the bracelet.
This will keep the hook from catching or snagging things while the bracelet’s being worn:

Now use your round nose pliers to grasp your wire on the 0.5″ mark you drew.
Bend the wire end in the same direction as the curve you just made. Keep bending to make a nice hook:

Now we’re going to make the spiral end of the bracelet.
On the wire end where you drew a mark 3″ (7.62 cm) from the end, use your fingers to straighten out the wire – beginning at the 3″ mark, out to the to the end of the wire.
The straighter this part of the wire is, the easier it will be to make a nice spiral:

If you’ve never made an open wire spiral (or have struggled to make one), watch my 3-minute video on How to Make an Open Wire Spiral.
Now grasp the end of the wire in your pliers and make a curve; this will be the center of your spiral:

Move your pliers a tiny way down the wire, and make a tiny bend in the wire.
Keep moving your pliers along the wire in tiny steps, and make tiny bends in the wire as you go, to continue the open spiral:

Continue to form your spiral until your 3″ Sharpie mark is at about this point on your spiral:

Straighten and flatten your spiral if necessary.
You can also use your nylon or rawhide hammer to work-harden your spiral if it doesn’t feel sturdy enough.
Remove any remains of your Sharpie marks from the wire, using a few drops of rubbing alcohol on a scrap of paper towel.

Enjoy your lovely new Zen Spiral bangle bracelet!

