
Memory Wire Pendant and Earrings (Tutorial)
by Rena Klingenberg. © 2003-Present Rena Klingenberg. All Rights Reserved

This circle pendant and hoop earring set is made with Memory Wire – a hardened wire that comes in coils, similar to a “Slinky” toy.

The pendant is made with bracelet-size Memory Wire, while the earrings use the ring-size wire.
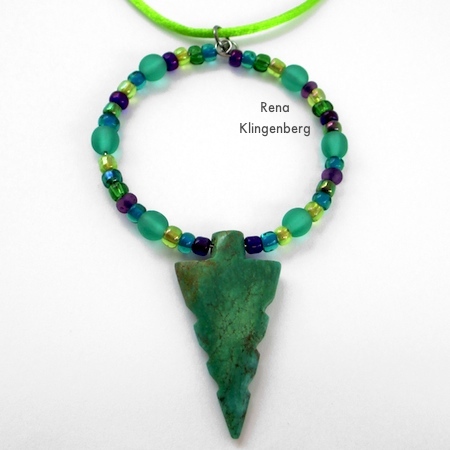
A focal bead, a few accent beads, and a handful of seed beads will turn the wire into a fabulous, colorful jewelry set!

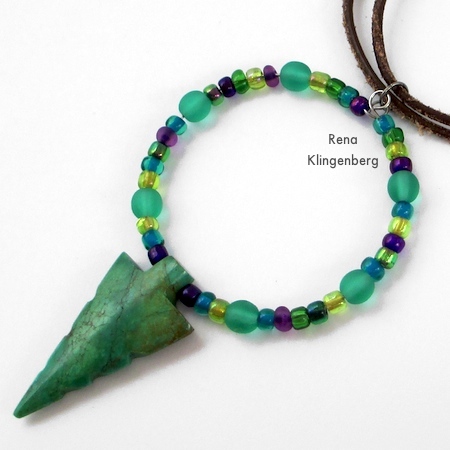
I love the contrasting shapes of triangular arrowhead and circular pendant hoop.
Supplies:
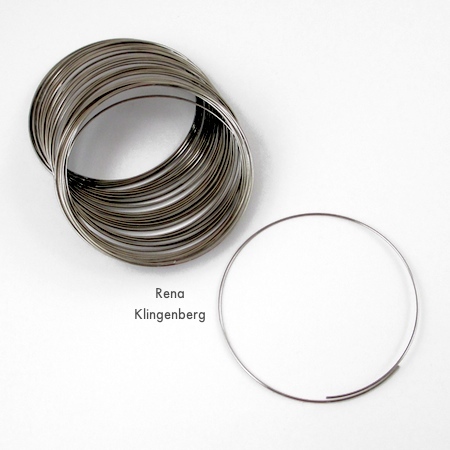
- Bracelet size Memory Wire – 1 coil (for the pendant).
- Ring size Memory Wire – 2 coils (for the earrings).
- 3 medium-size jump rings.
- A pair of earwires.
(Mine are from my Easy Fancy Earwires Tutorial.) - Memory Wire cutter – don’t ruin a wire cutter that’s not made to handle memory wire!
I use a Xuron cutter that’s made to cut memory wire. You might also use a hardware-store wire cutter that’s made for hard wire. - Round nose pliers – again, don’t ruin your regular pliers by using them on Memory Wire! Use pliers that are made for Memory Wire.
I use sturdy hardware-store round nose pliers. - Regular jewelry flat nose pliers (for opening and shutting jump rings).
- Regular jewelry chain nose pliers (for opening and shutting jump rings).
- A clip to keep the beads from sliding off one end of the wire while you’re working at the other end of the wire.
I use a small rubber-tipped metal clip. You might also use a clothespin, binder clip, or other small household clip. - A focal bead for the pendant.
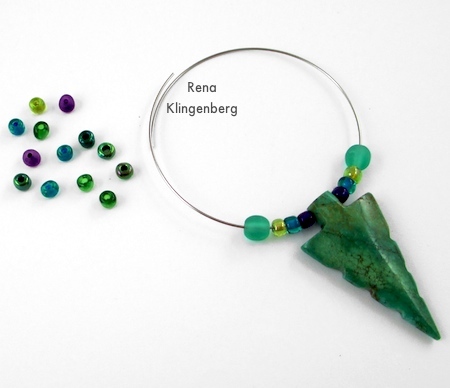
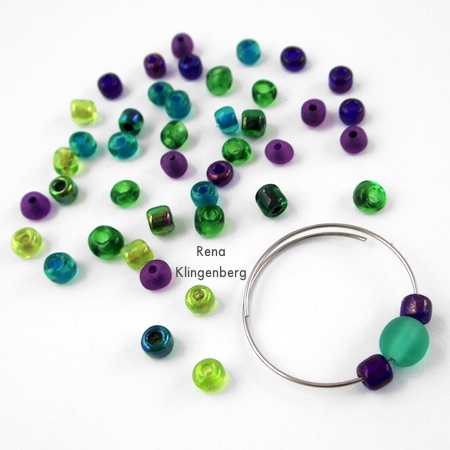
I’m using a green turquoise arrowhead, size 21mm x 40mm, with a side-drilled hole through the top. - A few accent beads.
I’m using 5mm round glass green beads. - A seed bead mix – size 6/0 beads.
I’m using a mix called “Birds of a Feather” from Bead Treasures. I like how these colors work with the green turquoise arrowhead.
How to Make a
Memory Wire Pendant:
We’ll make the pendant first.
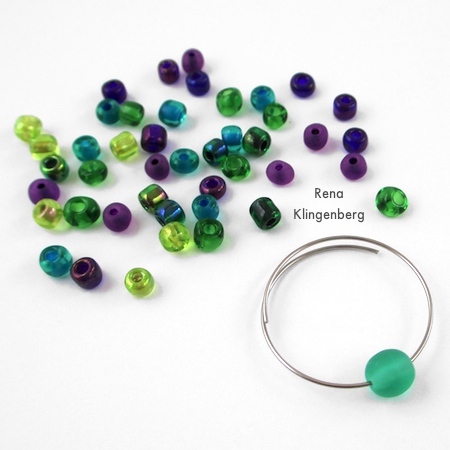
Choose your beads for the pendant.
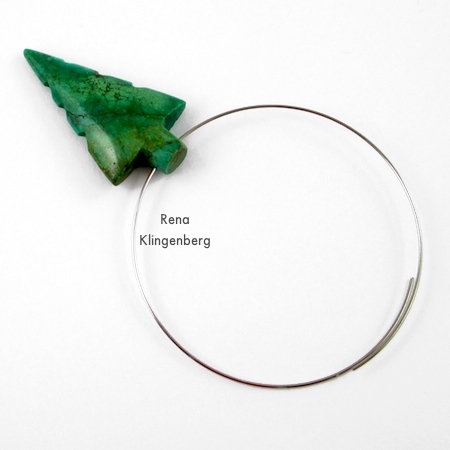
You’ll need a side-drilled focal bead with a drill hole that will accommodate the Memory Wire.
My focal is this green turquoise arrowhead, size 21mm x 40mm:

You’ll also need some accent beads; I like these 5mm, semi-transparent glass beads:

You’ll also need some size 6/0 seed beads:

Now it’s time to use your Memory Wire cutter to cut off one coil from the bracelet-size Memory Wire stack.
The Memory Wire wire measurement does NOT have to be an exact science.
Later I’ll show you how you can get the pendant and earrings to work, even if your looped wire ends have a gap between them.
The wire ends on the cut-off coil should overlap enough for you to make a loop in each end later:
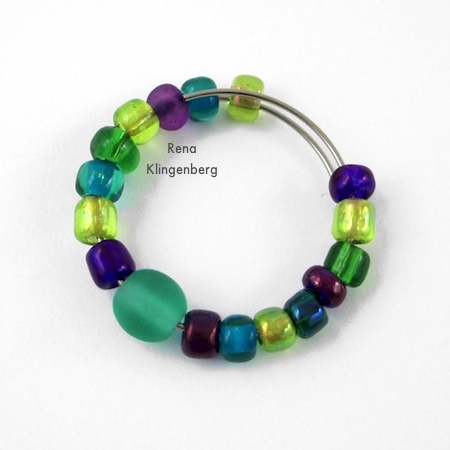
We’ll start by stringing the focal bead onto the wire, and then bead out on each side of the focal.

After threading your focal onto the wire, slide it around to the center of the wire:
Now start stringing your seed beads onto the wire, on each side of your focal:
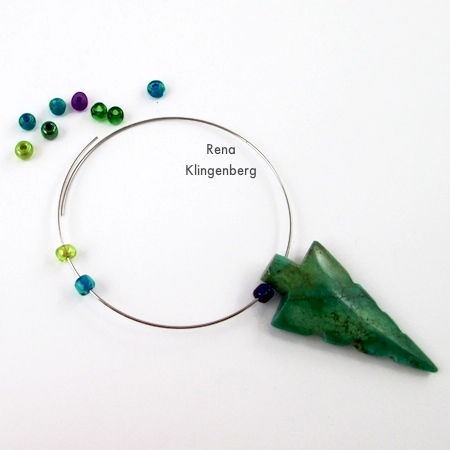
Add some of your accent beads wherever you like:
As your wire fills up with beads, use a clip on one end of the wire to prevent beads from escaping while you’re working at the other end of the wire:
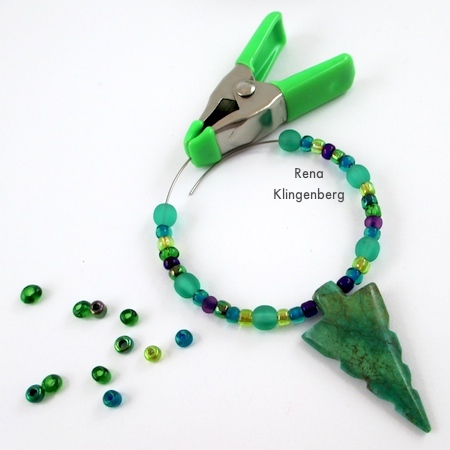
Continue beading both sides until you have just enough wire left to make a small loop in each of the wire ends:

With the clip still attached to one end of your wire, use your sturdy round nose pliers at the other end of the wire, to turn the wire end into a small loop:
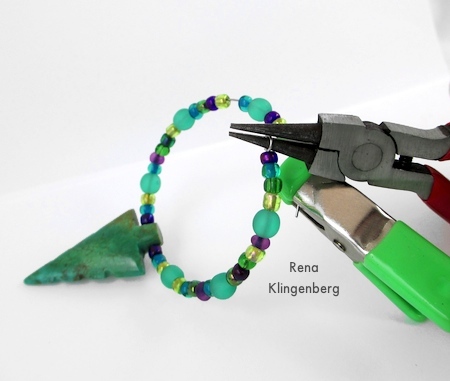
Now your wire should look like this, with one loop end and one straight end:

Use your pliers to make an identical loop in the other end of the wire:

Your wire ends should look like this:

Now we need to bring the two wire loops together, so the loops lie one on top of the other.
Although Memory Wire is stiff and springs back easily, you can still use your fingers to push and pull it into a slightly smaller circle so that the loops line up together like this:

Now use your flat nose and chain nose pliers to twist open one of your jump rings.
(If you’re new to using jump rings, see my quick tip, How to Open and Close a Jump Ring.)
Thread the jump ring through both wire loops, and then use your pliers to twist the jump ring shut:

Your Memory Wire pendant is finished!
Now you can use the jump ring to attach your pendant to your choice of chain, cord, etc.:

How to Make
Memory Wire Earrings:
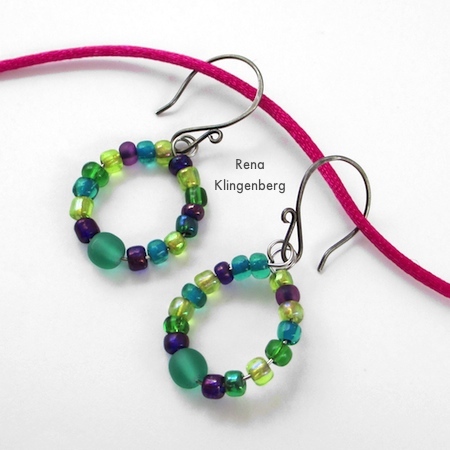
For the earrings, I used the 5mm round green glass beads for a focal on each hoop, and seed beads for the rest of the hoop.
Start with your focal bead in the center of the earring hoop:
. . . then build up the seed beads on either side of the focal:
. . . until you have just enough wire left to make a small loop in each of the wire ends:
Use your sturdy round nose pliers to turn each wire end into a small loop:

Again, the wire measurement doesn’t have to be exact science.
You can get these hoop earrings to work, even if your loops wind up far apart from each other as shown here:

On each hoop earring, we need to bring the two wire loops together, so the loops lie one on top of the other.
Although Memory Wire is stiff and springs back easily, you can still use your fingers to push and pull it into a slightly smaller circle or oval, so that the loops line up together like this:

Now it’s time to finish the earrings.
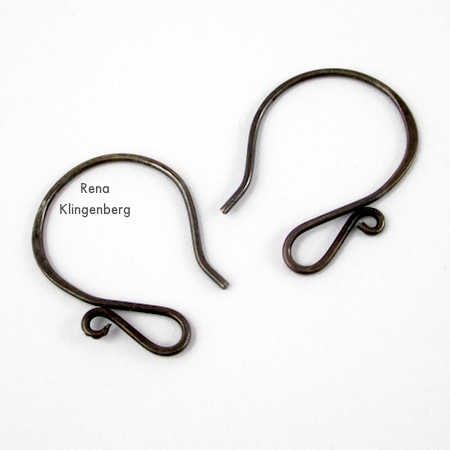
Get out your earwires.
Mine are from my Easy Fancy Earwires Tutorial:
Use your flat nose and chain nose pliers to twist open one of the earwires.
Thread both wire loops of one hoop earring onto the opened earwire.
Then use your flat nose and chain nose pliers to twist the earwire shut again.
Attach the remaining earwire to the remaining hoop earring.
Now your finished earrings should look something like this:

More views of the finished Memory Wire pendant and earring set:

